Well since my last post i have been on a roller coaster. But tonight is looking like fun i am going to hang out with a bunch of friends for college night at Buffalo Wild Wings . It shall be an amusing time before i come home and do more work. I also got an email about a possible job! so i am happy
Well thats all for now i hope more people join in on the contest!
~Zekie
Sunday, February 27, 2011
Thursday, February 24, 2011
Mid terms! and Viruses!
So I have mid terms coming up next week or so, I will not be posting as much due to trying to study and make sure i am prepared for them. This will be difficult since I have a math mid term and I really hate math. Last night i was surfing the web trying to find something to watch on netflix and such, when all of a sudden i get a message saying that my computer is infected with malware.... Now let me set the scene for you all. I am running a windows 7 OS. Now this "Anti Virus" randomly pops up when I started to make my way to google. Now everyone knows that your Anti Virus if you have one will pop up on your computer itself and not make a new tab in your browser. So this "Anti Virus" makes a tab in my Google Chrome browser and shows me a Window XP OS and i just sit there and laugh my ass off due to the failure it has done.
I shut down that tab and take the time to scan my computer. It was most amusing since it showed me the wrong OS. Now since i am an IT professional and knew how to handle these types of problems. What do you all think about the Fake Anti viruses that are actually viruses?
I shut down that tab and take the time to scan my computer. It was most amusing since it showed me the wrong OS. Now since i am an IT professional and knew how to handle these types of problems. What do you all think about the Fake Anti viruses that are actually viruses?
Monday, February 21, 2011
Contest! It's coming fast!
Well Guys/Ladies i figured i would bring this up again. The contest is set to begin March 15th to go with the new format or the blog there is a contest entry form. It needs to be completely filled out. If you forget your email or Blogger user name you will not be eligible for winning any of the prizes. Again the prizes are...
One $50 Dollar gift card to Best Buy
Two $25 Dollar prepaid visa cards.
Two 550 Paracord Lanyards
The contest goes from march 15th to the 31st. You are able to comment twice a day on Contest related posts. Each post will have a point value depending on on the amount of thought put into it. Meaning answering asked questions or simply sharing your opinions.
If you have any questions please leave a comment.
Thanks,
Zekie
look guys...
If you haven't noticed at all but we have a new look here on this blog. It looks Awesome to me what do you guys think? Like this one better or did you like the last one? Leave me feed back guys i always appreciate your comments and i want to see what y'all think about this! let me know.
Thanks,
~Zekie
Thanks,
~Zekie
Saturday, February 19, 2011
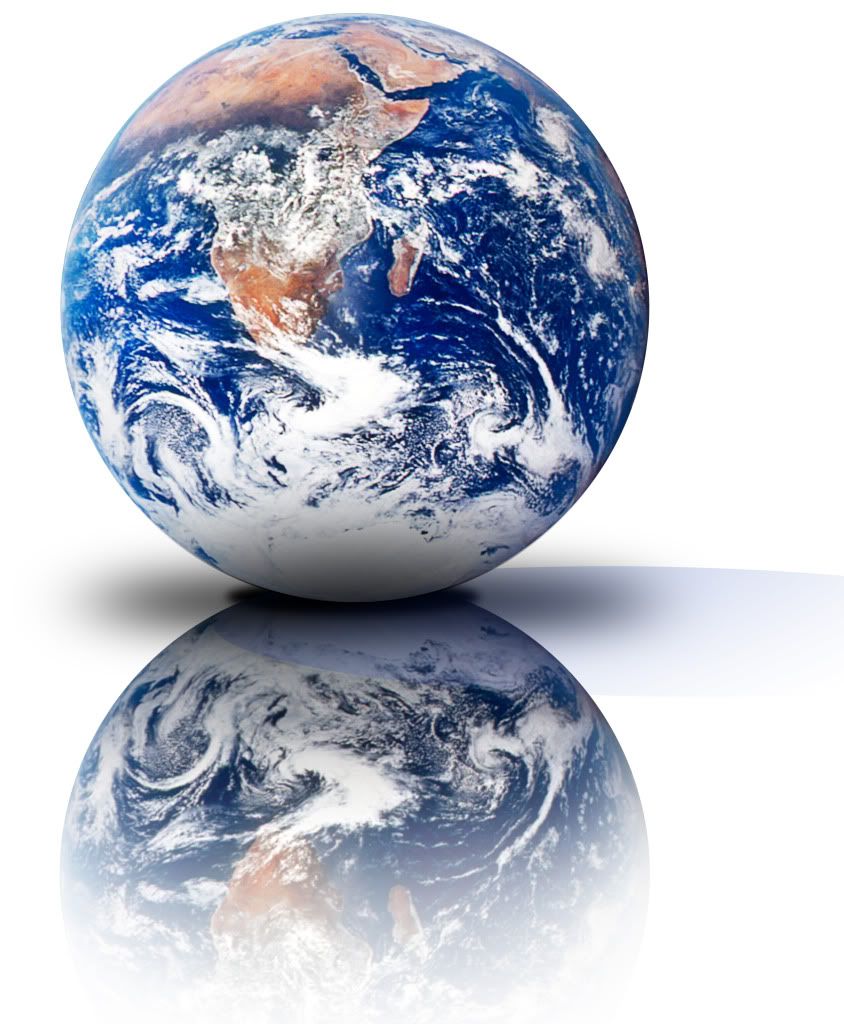
End of the world....Enjoy...
Ok gentlemen/ladies today i have that tutorial i promised for you on how to make the end of the world that i showed a few days ago.
Step 1:
Make it fairly large 1280 x 1280 will do just fine (final comp will be a bit bigger).
Press D to reset FG/BG-color, then add a new Gradient Fill Layer – Name it “City Lights”. Pick a Radial gradient that goes from a white center to a black edge.

Step 2:
Now we will add some filters, it can be helpful to use the Filter Gallery to append these three filters…
Filter > Artistic > Plastic Wrap

Filter > Stylize > Glowing Edges

Filter > Texture > Stained Glass

Step 3:
Go to Image > Canvas Size and set it to 2048 x 1536px or whatever size you want your final composition size to be (note: the image will be scaled down later on).

Duplicate the City Lights Layer, then scale down the original (City Lights) to the size you want for the earth on your final piece.
Merge City Lights with Background. Name the Layers as shown below.

Step 5:
Working on the layer Flames. Select Filter > Blur > Radial Blur.

Select Filter > Distort > Wave.

Repeat the filter 2 or 3 times, each time click the Randomize-button (Ctrl + Alt + F). Set the blending mode of Flames to Screen, and lower the opacity to about 70%.

Step 7:
Duplicate Background and place it on the top of your layer stack, name it Smoke. Press D to reset your FG/BG-color, then select Filter > Render > Difference Clouds. Repeat the filter 5-6 times (or until you see a nice fire effect). Set the Blending Mode of Smoke to Color Dodge.

Step 8:
Add a new Color Balance Adjustment Layer, place it on the top of the layer stack.
Step 9:
Open up the picture in Photoshop, select the earth using the Circular Marquee Tool copy it and paste it in our fire document (I suggest you select a bit inside the actual edge, to leave out any white). Click here for image (save it.)

Step 10:
Resize the earth so that it fits your “fireball” thingy ;) It does not matter if there are some white dots outside the earth. In fact, it might even look cooler!

Step 11:
Create a Layer Mask for Earth layer. Use a medium sized brush and start brushing the mask with Black/White to hide and reveal details.
Power tip: Use the smudge tool to mess up the edge of the mask, to make the fire look more natural

Step 12:
Add a Hue/Saturation Adjustment Layer, choose to use previous layer as Clipping Mask. Lower the Saturation and Lightness.

Step 13:
Create a new document 4000 x 3000 px, render some default colored clouds, copy and paste to our composition as a new layer Clouds.

Step 14:
Set the Blending Mode to Lighten for Clouds. Add a Layer Mask, fill it with black. Grab a soft large brush, set the opacity to about 5%, then paint in some clouds by drawing on the mask with a white color. Draw around the earth, then crank up the opacity and lower the size of the brush when you get more close to the edge.

Step 15:
Ctrl + Click on the Layer Icon for Earth. Create a new Fill Layer, any color. Set Fill (located below Opacity) of the Layer to 0%.
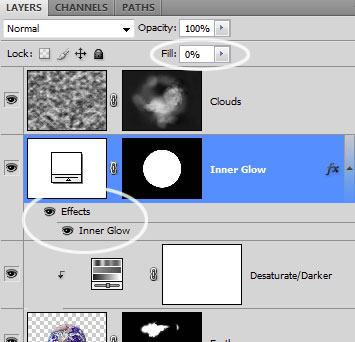
Double-click the layer and add an Inner Glow effect (dark red color).

Step 16:
Duplicate the Inner Glow layer you just created. Move the layer down so that it gets placed just above Background. Un-check the Outer Glow effect, then add an Outer Glow instead.
Duplicate the top Inner Glow again, this time make the inner glow a bright red color and decrease the effect. Set outer glow of this layer to a bright red color and decrease the effect.

Step 17:
For the star sky, create a new layer on top of all other layers. Fill it with black, then go to Filter > Noise > Add Noise.

Select Filter > Blur > Gaussian Blur, set it to about 0,4-0,8. Add a Levels Adjustment Layer, use Previous layer as Clipping Mask and drag the Midtones-slider to the right until you see a nice sky. Mask out the earth, then set the Blending Mode of the sky to Lighten.

Step 18:
Adding one final Color Balance Adjustment Layer on top of the whole layer stack will help you to tweak the colors of the final image. Add some blue for midtones and shadows, then crank up the yellow and red for highlights. Also on the Earthlayer you can set the Lightness and Saturation to almost 0 and control the effect with a radial gradient + brush mask instead. If you want the lava less textured, you can duplicate the Background and blur it, then mask parts of the fire that you want to blur.
When you are happy with the result, save a copy of the image then go to Image > Resize.

Setting re-sampling algorithm to Bicubic Sharper will keep the stars and the lava crisp.

Step 19:
Select the Background layer and go to Filter > Render > Lens Flare. You may have to play around with the position to get the flare right.

Step 20:
Create a new layer on top of all other layers. Then repeat the Lens Flare filter (Ctrl + F). Lower the Opacity of the layer a bit and set the Blending Mode to Screen. You might want to mask out some of the details on this one.

There you go everyone. Here is that Tutorial... Might do a few others... Good luck
Subscribe to:
Posts (Atom)